How to install M.2 NVMe SSD in 5 Easy Steps
NVMe SSDs with M.2 form factor currently offer the most advanced technology in the storage space. In addition to the speed, the ease of installation is one of the best features. Our guide explains how to install this type of SSDs.
Install M.2 SSD easy and without cables
SSD are gradually replacing the conventional HDD hard drives, and the M.2 modules are now the option to do so. The modules are extremely compact and have no wires because they are connected directly on the mainboard. Very similar to RAM sticks.
To install M.2 SSD you should do the following:
Check compatibility
Before you buy make sure the mainboard has a compatible M.2 slot. Check the specification for this information.
Open the case
The first thing you may have to do is to open your PC case to gain access to the motherboard and M.2 slot.
Cheche your M.2 form factor and the spacer location
Multiple spacer locations are possible depending on the form factor of the M.2 SSD
Loosen the M.2 screw
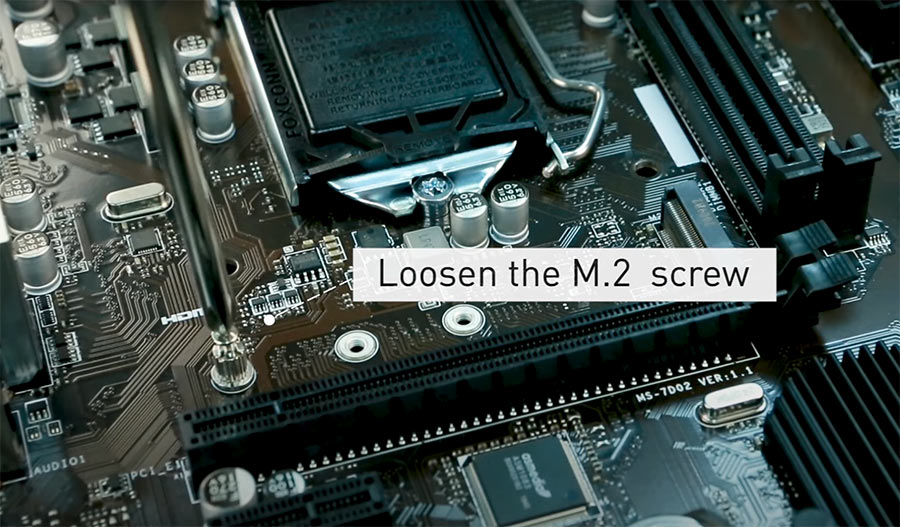
For the installation, you have to loosen the M.2 screw or unscrew all together and move the spacer to the proper location.
Latch the M.2
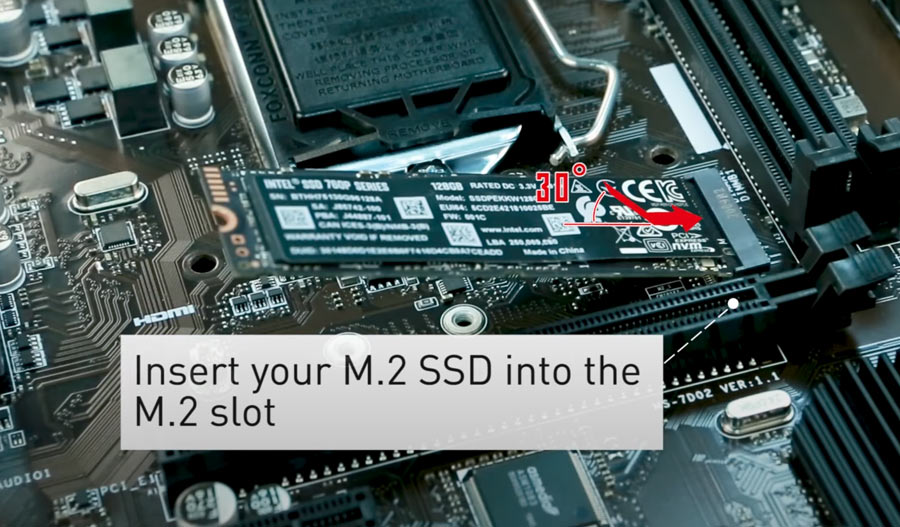
Once the screw is loose, you can latch the M.2 SSD onto the slot.
Secure the SSD
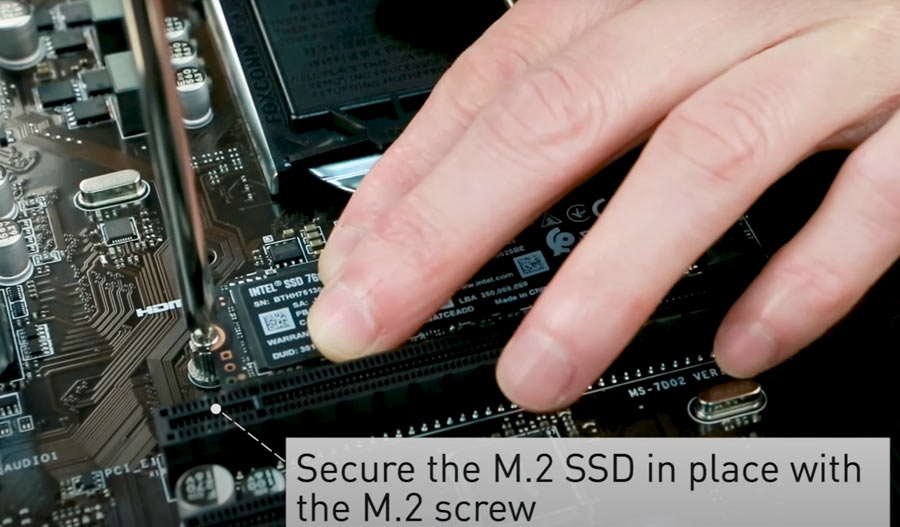
Finally, screw the M.2 screw and close the case.
M.2 SSDs have no cables, which not only makes installation easier, but also keeps the chassis tidy.